Author: Dan Kinsella

  • Live monitor log files with PowerShell

    To aid setup and debug scenarios for applications that output data to files, you can live monitor log files with PowerShell.

    The Get-Content cmdlet is used to write the contents of a file to the terminal:

    PS C:\WINDOWS\system32> Get-Content "C:\Temp\debugtest.txt"
    Line 1
    Line 2
    Line 3
    Line 4
    Line 5
    Line 6
    Line 7
    Line 8
    Line 9
    Line 10

    The Get-Content cmdlet has a parameter called -Wait which will keep the file open and write out any lines that are added to the file. It will keep the file open until we either close the terminal or type Ctrl+C to manually terminate execution.

    To demonstrate this, lets first create a small script to output lines to a file, which we can then monitor:

    For ($i = 1; $i -le 100; $i++)
    {
      Add-Content -Path "C:\Temp\debugtest.txt" -Value ('Line {0}' -f $i)
      Start-Sleep -Seconds 1
    }

    The above script will write the string “Line ” plus the value of variable $i to a file called C:\Temp\debugtest.txt 100 times, pausing for 1 second after every write.

    With the above file creator script running, I’m going to open a new PowerShell terminal and run the following command:

    Get-Content "C:\Temp\debugtest.txt" -Wait

    This will write out the contents of the file and keep the file open, updating the terminal with the lines being added:

    Monitor logs with PowerShell

    As stated, Get-Command will output the entire contents of the file to the terminal by default. If we are only interested in lines being added since running the command we can use a parameter called -Tail. Tail (or its alias -Last) will output the last x number of lines in the file. You must specify at least 1 or an error will occur:

    Get-Content "C:\Temp\debugtest.txt" -Wait -Tail 1


  • Managing AL Language extensions per workspace

    When working on multiple different versions of Business Central, you may have got in the habit of managing AL Language extensions by installing and uninstalling / disabling different versions of the AL language extension as you move between projects.

    Microsoft have made this management easier in recent versions of the AL language extension found on the Visual Studio Code marketplace place by providing multi-version support. This allows the developer to select the target platform version when creating a project workspace:

    Select Business Central platform


    But, what if you want to develop for a specific on-premise build of Business Central / Dynamics NAV 2018 or a currently unsupported version such as an insider build from the Collaborate programme? You’ll still need to import the VSIX file that ships with this version.

    Managing AL Language extensions

    Visual Studio Code provides functionality to enable / disable extensions on a per workspace basis.

    So to use this in practise lets say you want your default AL language extension in Visual studio code to be the version that comes from the Visual Studio Code Marketplace. If we leave this version alone after install, it will be enabled globally (i.e. available for all projects):

    Gloabbly available VS Code extension


    Now lets create a new project where we want to use a specific AL language extension shipped with the Business Central version we’re developing for.

    There are a few steps we’ll need to complete as follows:

    1. Obtain the VSIX file for the target AL language extension (found on the product DVD, or output in the terminal if using containers).
    2. Create a new workspace in Visual Studio Code by opening a folder.
    3. Import the VSIX file.
    4. Disable the new AL language extension. Then select Enable (Workspace)
    5. Identify the global AL Language extension and select Disable (Workspace)
    Obtain target VSIX file

    VSIX is the file format for Visual Studio Code extension packages. Each version of Business Central on-premise (and Dynamics NAV 2018) ships with a VSIX file in the product DVD.

    In the Business Central 2019 Wave 2 “DVD” the VSIX package is in the following location (assuming you’ve unzipped to C:\Temp):

    C:\Temp\Dynamics 365 Business Central 2019 Release Wave 2.GB.36649\ModernDev\program files\Microsoft Dynamics NAV\150\AL Development Environment\ALLanguage.vsix

    When using NAV/BC Docker containers a link to download the VSIX package is printed to the console when creating the container. If you’ve closed your console since creating the container you can use the docker logs command to display this information for any given container:

    PS C:\WINDOWS\system32> docker logs ALDEMO
    Initializing...
    Starting Container
    Hostname is ALDEMO
    PublicDnsName is ALDEMO
    Using NavUserPassword Authentication
    Starting Local SQL Server
    Starting Internet Information Server
    Creating Self Signed Certificate
    Self Signed Certificate Thumbprint B4342A2900B851600763A08FD1C8B03CC8B28622
    Modifying Service Tier Config File with Instance Specific Settings
    Starting Service Tier
    Registering event sources
    Creating DotNetCore Web Server Instance
    Enabling Financials User Experience
    Creating http download site
    Setting SA Password and enabling SA
    Creating dank as SQL User and add to sysadmin
    Creating SUPER user
    WARNING: The password that you entered does not meet the minimum requirements. 
    It should be at least 8 characters long and contain at least one uppercase 
    letter, one lowercase letter, and one number.
    Container IP Address: 172.30.134.252
    Container Hostname : ALDEMO
    Container Dns Name : ALDEMO
    Web Client : http://ALDEMO/BC/
    Dev. Server : http://ALDEMO
    Dev. ServerInstance : BC
    
    Files:
    http://ALDEMO:8080/al-4.0.192371.vsix

    Just copy the VSIX file URL into your browser to download.

    Create a new workspace in Visual Studio Code

    So you could change the target AL Language extension on an existing project, but you may need to change some of the parameters in the launch.json and/or app.json files that get generated by the AL language extension due to differences between versions.

    To keep things simple I’m going to create a new project to use by creating a new folder and opening that in VS Code. Once I’ve activated the AL Language version I require, I’ll use that to generate the app.json and launch.json files.

    1. Hit F1 to open the command palette.
    2. Search for and execute Open Folder.
    3. In Open Folder Dialog create new folder and open.
    Import the VSIX file into Visual Studio Code

    The AL language VSIX file can now be imported into Visual Studio Code:

    Import VSIX - VS Code

    Enable new AL Language extension version for current workspace only

    With our new extension installed, we’ll first need identify it based on the version number, disable it, and then enable it for the current workspace only:

    Enable Visual Studio Code extension for workspace

    Disable the global AL Language extension for the current workspace

    Next we need to disable our default AL Language extension for the currently opened workspace.

    Disable VS Code extension for current workspace


    Now we can complete the project setup by creating a new .al file in the workspace which will prompt us to generate a manifest file (app.json). The launch.json file will get created automatically if one doesn’t already exist in the workspace when you try to download symbols.

  • Business Central AL Interface type

    The AL Interface Type

    Unfortunately I’m not able to attend NAVTech Days this year, but I am paying attention from a far and saw some very interesting posts on Twitter about a new type available in the forthcoming Business Central 16.x release. The AL interface type.

    The concept of interfaces won’t be new to any one from the object orientated world of programming languages. I first used them with Java and it’s great to see Microsoft expanding the AL language to give us more features that open up a whole new world of software design.

    The AL interface type give us the ability to use the techniques of abstraction and loose coupling in AL. To explain this lets look at an interface declaration:

    interface IErrorHandler
    {
        procedure HandleError(ErrorCode : Code[10]; ErrorMessage : Text[1024]);
    }

    As we can see, the interface IErrorHandler declares a procedure but does not have a procedure body. The procedure is not implemented in the interface.

    A codeunit must be created to implement the interface and provide the behaviour. Implementing codeunits must implement every procedure declared by any interface it implements. An important point to remember when designing interfaces.

    To implement an interface, we use the implements keyword followed by the interface name after the codeunit declaration:

    codeunit 50104 "Throw Error" implements IErrorHandler
    {
        procedure HandleError(ErrorCode: Code[10]; ErrorMessage: Text[1024])
        var
            Errortext: Label 'Error Code: %1\Error Message: %2';
        begin
            Error(ErrorText, ErrorCode, ErrorMessage);
        end;
    }

    An interface can be implemented by many different codeunits, all providing their own behaviour. Lets create another implementation of IErrorHandler:

    codeunit 50105 "Log Errors in Database" implements IErrorHandler
    {
        procedure HandleError(ErrorCode: Code[10]; ErrorMessage: Text[1024])
        var
            ErrorLog : Record "Error Log";
        begin
            ErrorLog.Validate(Code, ErrorCode);
            ErrorLog.Validate(Description, ErrorMessage);
            ErrorLog.Validate("Logged On", CurrentDateTime);
            ErrorLog.Insert();
        end;
    }

    So now we have two codeunits which both implement IErrorHandler in their own way. The compiler knows that any codeunit that implements IErrorHandler must implement the HandleError function, which means we can write generic, loosely coupled code to handle the processing of errors and pass in the implementing codeunit as required:

    codeunit 50103 "Error Creator"
    {
        procedure ProcessError(ErrorHandler : Interface IErrorHandler)
        begin
            ErrorHandler.HandleError('Error1', 'This is an error message!');
        end;
    
        procedure CallErrorHandler(PersistErrors : Boolean)
        var
            ErrorLogCU : Codeunit "Log Errors in Database";
            ThrowErrorCU : Codeunit "Throw Error";
        begin
            If PersistErrors then
                ProcessError(ErrorLogCU)
            else
                ProcessError(ThrowErrorCU);
        end;
    }

    The ProcessError() method above takes a parameter of type Interface IErrorHandler, this means we can pass in any codeunit that implements IErrorHandler as seen in the CallErrorHandler() method.

    A codeunit can implement multiple interfaces using comma separation:

    codeunit 50105 "Log Errors in Database" implements IErrorHandler, ISomeOther, ISomeOther2
    {
       // implementation here...
    }

    Note: The I prefix on the interface name is not mandatory but is a common convention used in C#.

    The interface type was revealed during the NAVTechDays 2019 opening keynote, which is now available on YouTube here (1:17:30).

  • Add User in Dynamics 365 Business Central Cloud

    Business Central Cloud User

    In one of my earlier blog posts I wrote how you can add a user in Business Central On-premises (formerly Dynamics NAV) using PowerShell. This blog post shows how to add a user in Business Central Cloud / SaaS.

    The big difference between Business Central On-premises and Business Central Cloud (or SaaS) is that the Cloud version requires Azure Active Directory (AAD) authentication. As a consequence, to create a new user in Business Central Cloud you must first create a user in AAD and assign a Business Central licence to this user.

    There are a number of ways to create an AAD user, for instance via the Office 365 Administration Center or from the Azure Portal. In this post we’ll add the AAD user though the office.com admin center.

    Creating an AAD user through the Microsoft 365 Admin Center

    As an Office 365 administrator, open office.com and you’ll have access to the Admin Center:

    Office 365 Administration
    Office 365 Administration

    Note: If you can’t see the admin center icon above, try selecting ‘All apps’ and look through the list. If it’s still not there check your Microsoft 365 user permissions with an administrator.

    With the Microsoft 365 admin center open we can create a new user:

    Add Office 365 user

    Fill in the basic user information:

    Add Microsoft 365 userAfter selecting Next, assign the Business Central licence to the user (and any other licenses required):

    Assign user licences

    Optionally add additional user rights, then finish:

    Finish adding Microsoft 365 user

    With the Microsoft 365 user created, we can now add the user to Business Central.

    Add User in Dynamics 365 Business Central Cloud

    Once the user has an Azure Active Directory account with a Business Central licence assigned, we can add the user to Dynamics 365 Business Central Cloud via the Users page:

    Find the Users page via the search function (Alt+Q):

    Find Business Central Users page

    Open the Process menu:

    Business Central Add User

    Click Get New Users from Office 365:

    Get New Users from Office 365

    Business Central will now query active directory and add any new users it finds with a Business Central licence assigned.

    Add User in Dynamics 365 Business Central Cloud

    With the new Business Central user created, you can now continue the user setup by assigning User Groups and/or Permission Sets to the user record.

  • How-to: Run LS Central in a Docker container – Part 2

    Docker containers

    In my previous blog post How-to: Run LS Central in a Docker container I showed how you can run LS Central on Docker with some manual steps to get the client and server components installed.

    For this blog post I’m going to show a more reusable solution where you can install the client components via a script passed into the container.

    To make the Business Central Docker images configurable, the designers decided to incorporate a set of Powershell script files which can be substituted at build time to override the standard setup process. The standard scripts are found in the containers C:\Run directory:

    Business Central container run contents
    The AdditionalSetup.ps1 script file, which is empty by default, when overwritten will execute after the main setup has completed. This is where we can provide code to install additional components such as client and service add-ins.

    When you place a script with the same name into the containers C:\Run\my directory, Docker will use this version of the file instead of the standard version. As we saw in my previous blog post the New-NavContainer Cmdlet’s -myScripts parameter is used to copy files from the Docker host into the containers C:\Run\my directory.

    I’ve created an AdditionalSetup.ps1 file with the following content:

    Write-Host "Installing LS Client Components.."
    
    & "C:\Run\my\LS Central 13.04.00.852 Client Components.exe" /silent
    
    Write-Host "Installing LS Service Components.."
    
    & "C:\Run\my\LS Central 13.04.00.852 Service Components.exe" /silent
    
    Write-Host "Remove database backup.."
    
    Remove-Item -Path 'C:\Run\my\*' -Include *.bak

    Note: The reason I’m not cleaning up the installer files is because I was getting an access denied error. If anyone knows why I can delete the database backup but not the .exe files please let me know in the comments!

    For this example I’ve created a folder on the Docker host machine with the following content:

    LS Central install files


    Now I can run a script to build the container, using my setup files and additional setup script:

    $imageName = "mcr.microsoft.com/businesscentral/onprem:1810-cu3"
    $navcredential = New-Object System.Management.Automation.PSCredential -argumentList "admin", (ConvertTo-SecureString -String "admin" -AsPlainText -Force)
    New-NavContainer -accept_eula `
                        -containerName "LSDEMO2" `
                        -Auth NavUserPassword `
                        -imageName $imageName `
                        -Credential $navcredential `
                        -licenseFile "C:\Temp\LS\BC13License.flf" `
                        -updateHosts `
                        -alwaysPull `
                        -additionalParameters @('--env bakfile="c:\run\my\w1-ls-central-13-04-release.bak"') `
                        -myScripts @(`
                                    "C:\Temp\LS\w1-ls-central-13-04-release.bak", `
                                    "C:\Temp\LS\LS Central 13.04.00.852 Client Components.exe", `
                                    "C:\Temp\LS\LS Central 13.04.00.852 Service Components.exe", `
                                    "C:\Temp\LS\AdditionalSetup.ps1"`
                                    ) `
                        -memoryLimit 8GB `
                        -accept_outdated `
                        -doNotExportObjectsToText
  • How-to: Run LS Central in a Docker container

    Microsoft have been releasing Business Central (formerly Dynamics NAV) as Docker images for a few years now. These have been great for testing and learning the new developer tools and trying out new functionality, but in real life many of us don’t use vanilla Business Central. You, like me, probably need an ISV solution and it’s demo data before Docker is useful on customer projects and demos.

    This blog post shows one way you can get LS Central by LS Retail running in a Docker container.

    LS Central releases contain a demo .bak file which we’ll use to replace the default .bak file that comes with Business Central. We’ll also need the client and server add-in files to deploy to the container.

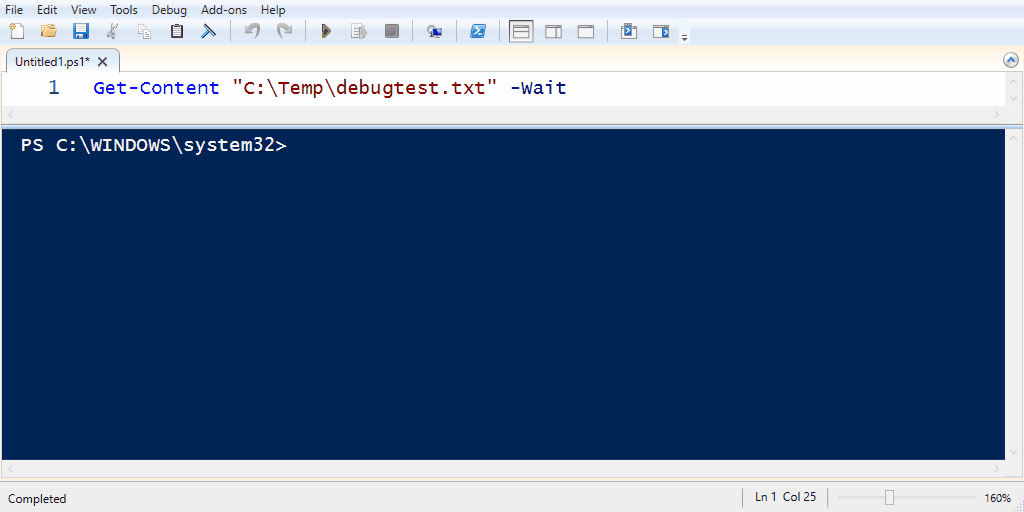
    Note it’s important that any installer packages can run in unattended/silent mode as Windows Server Core based containers do not have a GUI to handle any user interaction. One way to check this is to run the .exe with the /? parameter and see if it prints out any information. LS Central installers use the /silent parameter:

    PS C:\Temp\LS> & '.\LS Central 13.04.00.852 Client Components.exe' /?
    
    ---------------------------
    Setup
    ---------------------------
    The Setup program accepts optional command line parameters.
    
    
    /HELP, /?
    
    Shows this information.
    
    /SP-
    
    Disables the This will install... Do you wish to continue? prompt at the beginning of Setup.
    
    /SILENT, /VERYSILENT
    
    Instructs Setup to be silent or very silent.
    
    /SUPPRESSMSGBOXES
    
    Instructs Setup to suppress message boxes.
    
    /LOG
    
    Causes Setup to create a log file in the user's TEMP directory.
    
    /LOG="filename"
    
    Same as /LOG, except it allows you to specify a fixed path/filename to use for the log file.
    
    /NOCANCEL
    
    Prevents the user from cancelling during the installation process.
    
    /NORESTART
    
    Prevents Setup from restarting the system following a successful installation, or after a Preparing to Install failure that requests a restart.
    
    /RESTARTEXITCODE=exit code
    
    Specifies a custom exit code that Setup is to return when the system needs to be restarted.
    
    /CLOSEAPPLICATIONS
    
    Instructs Setup to close applications using files that need to be updated.
    
    /NOCLOSEAPPLICATIONS
    
    Prevents Setup from closing applications using files that need to be updated.
    
    /RESTARTAPPLICATIONS
    
    Instructs Setup to restart applications.
    
    /NORESTARTAPPLICATIONS
    
    Prevents Setup from restarting applications.
    
    /LOADINF="filename"
    
    Instructs Setup to load the settings from the specified file after having checked the command line.
    
    /SAVEINF="filename"
    
    Instructs Setup to save installation settings to the specified file.
    
    /LANG=language
    
    Specifies the internal name of the language to use.
    
    /DIR="x:\dirname"
    
    Overrides the default directory name.
    
    /GROUP="folder name"
    
    Overrides the default folder name.
    
    /NOICONS
    
    Instructs Setup to initially check the Don't create a Start Menu folder check box.
    
    /TYPE=type name
    
    Overrides the default setup type.
    
    /COMPONENTS="comma separated list of component names"
    
    Overrides the default component settings.
    
    /TASKS="comma separated list of task names"
    
    Specifies a list of tasks that should be initially selected.
    
    /MERGETASKS="comma separated list of task names"
    
    Like the /TASKS parameter, except the specified tasks will be merged with the set of tasks that would have otherwise been selected by default.
    
    /PASSWORD=password
    
    Specifies the password to use.
    
    
    For more detailed information, please visit http://www.jrsoftware.org/ishelp/index.php?topic=setupcmdline
    ---------------------------
    OK   
    ---------------------------


    Of course if the installer is only adding DLLs to the add-ins folder then you could also get these files from another machine and copy them into the container. Have a look at the docker cp command documentation to see how to copy files into a container.

    We’re going to use the Create-NavContainer Cmdlet from the NavContainerHelper PowerShell module to build the container and use the LS demo database. We can use the -myScripts parameter to copy the LS components into the container, and then install them individually using the shell desktop shortcut the NavContainerHelper module creates.

    I used a script from Freddy’s Blog and adapted to suit. The steps look like this, adjust as required:

    $imageName = "mcr.microsoft.com/businesscentral/onprem:cu3"
    $navcredential = New-Object System.Management.Automation.PSCredential -argumentList "admin", (ConvertTo-SecureString -String "admin" -AsPlainText -Force)
    New-NavContainer -accept_eula `
    -containerName "LSDEMO" `
    -Auth NavUserPassword `
    -imageName $imageName `
    -Credential $navcredential `
    -licenseFile "https://www.dropbox.com/<blanked out>/Licence.flf?dl=1" `
    -myScripts @("C:\Temp\LS\w1-ls-central-13-04-release.bak", "C:\Temp\LS\LS Central 13.04.00.852 Client Components.exe", "C:\Temp\LS\LS Central 13.04.00.852 Service Components.exe") `
    -additionalParameters @('--env bakfile="c:\run\my\w1-ls-central-13-04-release.bak"') `
    -useBestContainerOS `
    -includeCSide `
    -updateHosts `
    -enableSymbolLoading
    

    In the above PowerShell script which I ran from PowerShell ISE, I copy the demo database and LS component installers into the containers C:\run\my directory using the -myScripts parameter, and then replace the database used during installation using the -additionalParameters parameter.

    Note: you must match the correct Business Central image for your demo database. LS Central 13.04 is based on Business Central On-prem CU3, check the release notes for the version you need and adjust he image name in the script above.

    So far so good, we have a running container but if we try and use the system we’ll quickly bump into a missing component error. Next we’ll need to install the LS components.

    The NavContainerHelper Module has conveniently left a command line shortcut on my desktop:

    We can use this to install our LS components which we loaded into the container c:\Run\my directory earlier:

    We now have LS Central running in our Docker container.

    If you want to use the LS Windows Client POS you’ll also need to copy the LS client components into local RTC add-ins folder created by NavContainerHelper. Assuming the container name is LSDEMO, the local add-in folder can be found on the Docker host machine here:

    C:\ProgramData\NavContainerHelper\Extensions\LSDEMO\Program Files\130\RoleTailored Client\Add-ins

    Enjoy!

    See Part 2 to automate creation further:

    How-to: Run LS Central in a Docker container – Part 2


  • HTTP Basic Authentication with the AL HttpClient

    Business Central and the AL language have made web service code much easier with the HttpClient and Json types available. Handling the HTTP Authorization header is easier too with the TempBlob table, which can now encode the basic authentication string using base64.

    See below for an example of how to add a basic authorisation header to the AL HttpClient:

    procedure AddHttpBasicAuthHeader(UserName: Text[50]; Password: Text[50], var HttpClient : HttpClient);
    var
      AuthString: Text;
      TempBlob: Record TempBlob temporary;
    begin
      AuthString := STRSUBSTNO('%1:%2, UserName, Password);
      TempBlob.WriteTextLine(AuthString);
      AuthString := TempBlob.ToBase64String();
      AuthString := STRSUBSTNO('Basic %1', AuthString);
      HttpClient.DefaultRequestHeaders().Add('Authorization', AuthString);
    end;

    Update 2019-07-04: Thanks to Arend-Jan Kauffmann commenting on LinkedIn to point out there is an even easier way to get the Base64 encoding done using Codeunit 10 “Type Helper”:

    procedure AddHttpBasicAuthHeader(UserName: Text[50]; Password: Text[50], var HttpClient : HttpClient);
    var
      AuthString: Text;
      TypeHelper: "Type Helper";
    begin
      AuthString := STRSUBSTNO('%1:%2, UserName, Password);
      AuthString := TypeHelper.ConvertValueToBase64(AuthString);
      AuthString := STRSUBSTNO('Basic %1', AuthString);
      HttpClient.DefaultRequestHeaders().Add('Authorization', AuthString);
    end;
  • Chocolatey packages for the AL developer

    What is Chocolatey?

    Chocolatey is a package manager for Windows. If you’ve ever spent time with a Linux distribution you may be familiar with package managers such as apt-get.

    Chocolatey enables you to download and install software packages from the command line as long as someone has created a Chocolatey package.

    How do I install Chocolatey?

    Full installation instructions here: https://chocolatey.org/install

    I use the PowerShell method:

    Set-ExecutionPolicy Bypass -Scope Process -Force; iex ((New-Object System.Net.WebClient).DownloadString('https://chocolatey.org/install.ps1'))

    Useful packages for the AL developer

    I’ve listed a few packages below, but browse/search the package gallery here: https://chocolatey.org/packages

    Visual Studio Code

    > choco install vscode -y

    Git

    > choco install git.install -y

    Docker Desktop

    > choco install docker-desktop -y

    SQL Server Management Studio

    > choco install sql-server-management-studio -y

    Postman

    > choco install postman -y

    SoapUI

    > choco install soapui -y

    Jenkins (an alternative to Azure DevOps build agents)

    > choco install jenkins -y

    Not directly Business Central related, but other packages I’ve needed:

    > choco install jdk8 -y
    > choco install jre8 -y
    > choco install maven -y
  • Business Central: AL Compiler

    AL Compiler

    The Business Central AL Compiler

    When you start looking into build automation, one of the first things you’ll need to figure out is how to build an AL project without Visual Studio Code. This blog post serves as a brief introduction to finding the AL compiler and how to run it from the command line.

    Where to find the AL compiler

    The Business Central AL compiler is shipped inside the AL Language extension (vsix) file. The easiest way I find to get the correct compiler version is to create a docker container using the Business Central image version required and extract the VSIX file. The container will provide a HTTP download link to the AL Language extension, but I prefer to copy the VSIX file to the local file system from the containers C:\Run directory using the docker cp command.

    The VSIX file is essentially a zip archive, so with 7zip installed I can extract the contents of the AL Language vsix file as-is, but you can also change the file extension to zip so the built in Windows zip tool can recognise the file. Of course we’ll want to script all this for automation, so as an example the following PowerShell can be used:

    Copy-Item C:\Temp\*.vsix -Destination C:\Temp\alc.zip
    
    Expand-Archive C:\Temp\alc.zip -DesintationPath C:\Temp\alc -Force
    
    $CompilerPath = 'C:\Temp\alc\extension\bin\alc.exe'

    The Expand-Archive Cmdlet requires the zip extension, so I first copy the vsix file and give the new file the zip extension.

    Once the archive has been extracted you can find the AL compiler (alc.exe) in the \extension\bin directory:

    alc.exe
    AL compiler (alc.exe)

    Run the AL compiler from the command line

    If we run the alc.exe application with the /? parameter,  the parameters supported by the AL compiler are printed to the screen:

    Microsoft (R) AL Compiler version 2.1.1.13845
    Copyright (C) Microsoft Corporation. All rights reserved
    
    AL Compiler Options
    
    - PROJECT DIRECTORY -
    /project: Specify the project directory.
    
    - OUTPUT FILE -
    /out: Specify the output package file name (default: the name is generated from the project manifest as __.app).
    
    - ERRORS AND WARNINGS -
    /warnaserror[+|-] Report all warnings as errors.
    /nowarn: Turn off specific warning messages.
    /errorlog: Specify a file to log all compiler and analyzer diagnostics.
    /ruleset: Specify a ruleset file that alters severity of specific diagnostics.
    
    - SETTINGS -
    /packagecachepath: Specify the cache location for the symbols.
    /target: Specify the compilation target.
    /features: List of feature flags.
    
    - MISCELLANEOUS -
    /parallel[+|-] Concurrent build. (Short form /p[+|-])

    The minimum required parameters are:

    • /project – to specify the AL project workspace root.
    • /packagecachepath – to specify the location of the symbol files and any dependent app files.

    So for example we could run the following:

    > alc.exe /project:C:\Temp\AL\TestProject /packagecachepath:C:\Temp\AL\TestProject\symbols

    If successful the built app file will be placed in the workspace root folder. Error and warning messages will be displayed in the console output.

    How-to get the symbol app files?

    So far so good, but if you you want to introduce build automation you’ll need a way of getting the latest symbol files for the compiler to reference.

    When using Visual Studio Code to build projects, you’ve probably noticed that the symbol files are downloaded from the Business Central service’s developer end-point. We can achieve the same result programmatically using the PowerShell Cmdlet Invoke-WebRequest.

    The following script serves as an example (the credential code came from here):

    $user = 'admin'
    $password = 'admin'
    $containerName = 'BCLATEST'
    $versionText = '13.0.0.0'
    $symbolPath = 'C:\Temp\AL\TestApp\symbols'
    
    $pair = "$($user):$($password)"
    
    $encodedCreds = [System.Convert]::ToBase64String([System.Text.Encoding]::ASCII.GetBytes($pair))
    
    $basicAuthValue = "Basic $encodedCreds"
    
    $Headers = @{
    Authorization = $basicAuthValue
    }
    
    $SystemSymURL = 'http://{0}:7049/NAV/dev/packages?publisher=Microsoft&appName=System&versionText={1}' -f $containerName, $versionText
    $AppSymURL = 'http://{0}:7049/NAV/dev/packages?publisher=Microsoft&appName=Application&versionText={1}' -f $containerName, $versionText
    
    Invoke-WebRequest $SystemSymURL -OutFile "$symbolPath\system.app" -Headers $Headers
    
    Invoke-WebRequest $AppSymURL -OutFile "$symbolPath\application.app" -Headers $Headers

    As an aside, the version I’ve used above for the versionText parameter (13.0.0.0) is now outdated as the Business Central April release is versioned 14, however, using version 13.0.0.0 still currently appears to download the correct symbols even on the April ’19 release.

    Thanks for reading,

    Dan

  • Add User in Dynamics NAV and Business Central On-premise with Powershell

    If you have access to an account with local administrator privileges to a Windows box hosting the Dynamics NAV or Business Central service, you can add your own user very easily with Powershell.

    Note: This post is about the on-premise version of Business Central (formerly Dynamics NAV), to add a user to Business Central Cloud/SaaS see here: Add User in Business Central Cloud / SaaS

    This functionality has been available for quite sometime in Dynamics NAV and continues to be applicable to Business Central On-premise… so it surprises me how often I get asked for a NAV user by technical staff. I’ll now be forwarding this blog post when asked!

    Another use for this of course (amongst other things) is when you need to restore a database which doesn’t contain a login you have access to. In the past we had to clear out the User related tables in SQL so NAV would give us access on first log on.

    There are two Cmdlets we need:

    New-NAVServerUser – Used to create the NAV user

    New-NAVServerUserPermissionSet – Used to assign a Permission Set to the user.

    As of Business Central CU03, the Cmdlets still have “NAV” in their name.

    So for example, using the Business Central or Dynamics NAV Administration Shell (run as administrator) we can add a new Windows user to NAV/BC and assign the SUPER Permission Set as follows:

    
    > New-NAVServerUser ServiceInstanceName -WindowsAccount DOMAIN\User.Name
    > New-NAVServerUserPermissionSet 
    ServiceInstanceName -WindowsAccount DOMAIN\User.Name -PermissionSetId SUPER

    If you want to add your currently logged on Windows user you can use the whoami command:

    
    > New-NAVServerUser ServiceInstanceName -WindowsAccount $(whoami)
    > New-NAVServerUserPermissionSet 
    ServiceInstanceName -WindowsAccount $(whoami) -PermissionSetId SUPER