Tag: LS Retail

  • How-to stop auto-login to Business Central On-prem with Windows Auth

    authentication

    Probably quite an unusual scenario.. so I’ll explain why it came up!

    A retail customer using LS Central wants to use their POS machine for both POS and back office functionality.

    The complication is; the POS (Web Client) needs to automatically login with the POS Windows account (the signed in Windows account) but for back office tasks they want the user to log in with their own AD accounts.

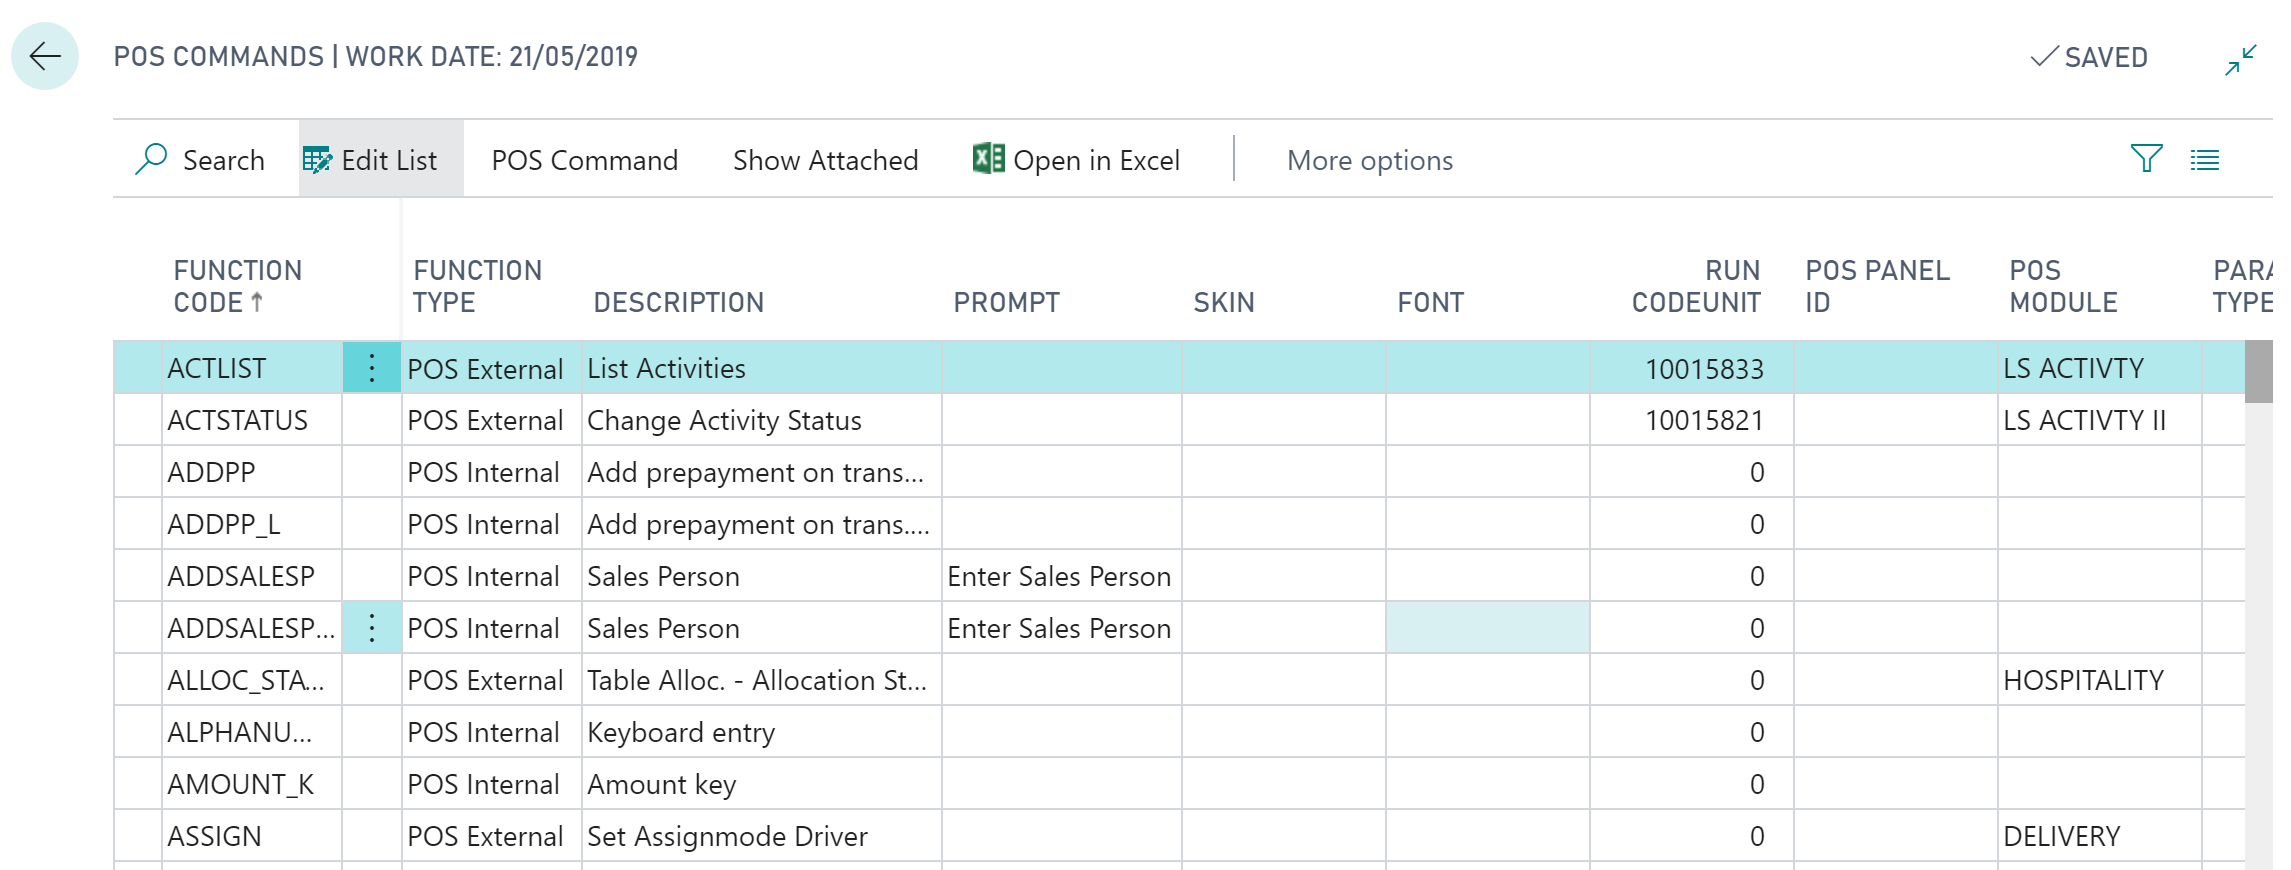
    The first thing that comes to mind is NavUserPassword for the BO users right? Well, the users are setup in AD so makes sense to use this rather than adding extra overhead of maintaining users/passwords in two places, plus they already have infrastructure in place using Windows auth. UserName auth? Sounds like it should work but again will require additional BC service and as the POS machine is on the domain and we’re using the Web Client it doesn’t really fit the brief:

    UserName – With this setting, the user is prompted for username/password credentials when they access Business Central. These credentials are then validated against Windows authentication by Business Central Server. There must already be a corresponding user in Windows. Security certificates are required to protect the passing of credentials across a wide-area network. Typically, this setting should be used when the Business Central Server computer is part of an authenticating Active Directory domain, but the computer where the Dynamics NAV Client connected to Business Central is installed is not part of the domain.


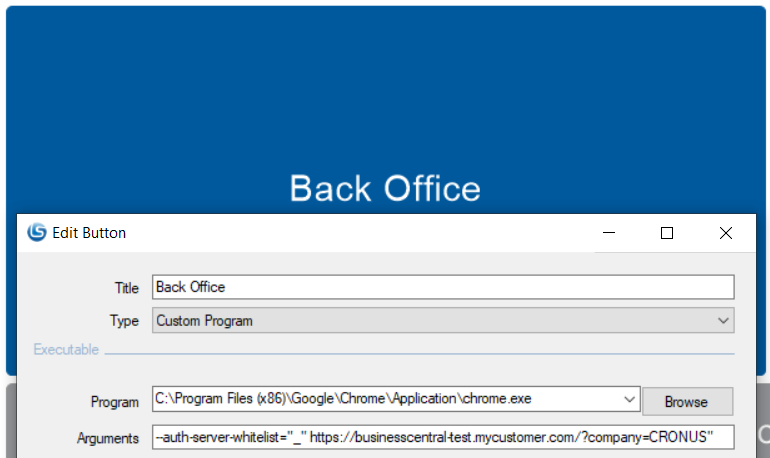
    So anyway, to cut a long story short you can disable passthrough Windows authentication in Chromium based web browsers (Chrome and Edge) by emptying the authentication server whitelist. This is done by adding a command line switch: –auth-server-whitelist=”_”

    In this case this meant creating a new button called Backoffice in LS Start to open Chrome and adding the –auth-server-whitelist switch to the parameter list along with the BC url.

    disable auto logon
    Of course, you can also add this command line switch to a Windows shortcut:

    auth server whitelist

    You’ll notice this will disable passthrough authentication for the open browser window, the problem is if you open another link in Chrome/Edge by default it will open it in the same window. To get around this we’ll need to add another command line switch to force Chrome/Edge to open this link in its own window: –new-window

    If you want to learn more about Chromium command line switches, have a browse over here: List of Chromium Command Line Switches « Peter Beverloo

    Job done.

  • How-to: Create External POS Commands for LS Central

    POS Command

    In this blog post I show how-to create External POS Commands for LS Central, and introduce a snippet to make this task repeatable.

    External POS commands allow you to extend LS Central functionality by creating Codeunits that can be run via POS buttons or actions.

    Before you get started, you might want to find out how-to run LS Central in a Docker container.

    The high-level tasks are as follows:

    • Create a Codeunit to contain our new POS Command module.
    • Write the POS Command logic in a procedure.
    • Add code to register the module and POS command(s).
    • Register the new POS command module in LS Central.

    To view the POS commands within Business Central, open the POS Commands list:

    POS Command

    As we can see above, POS commands have a Function Code which is used to call the command and a field Function Type which can be either:

    • POS Internal – Don’t specify a codeunit, these are used internally (hard-coded) within LS Central
    • POS External – Allow you to specify a Codeunit to extend LS Central functionality

    We’re going to be focusing on External POS commands, which we can see from the filtered External POS Commands List:

    External POS Commands

    The listed POS Commands can be assigned to buttons on the POS, POS Actions or called directly in AL code.

    Create a POS Command Codeunit

    POS Command Codeunits follow a pattern:

    • Must have the TableNo property set to “POS Menu Line”.
    • OnRun() handles the registration event.
    • OnRun() handles command invocation with a case statement.

    The OnRun trigger of our Codeunit will need to handle one of two scenarios: either the Codeunit is being registered, or a command is being invoked:

    To register our new module and external POS command we need to make use of the “POS Command Registration” Codeunit, which contains two procedures we’ll need:

    • RegisterModule – used to store the module information:
      • Module – A code for your Codeunit Module (Code[20]).
      • Description – A description of the module (Text[50]).
      • Codeunit – The Codeunit Object Id being registered.
    • RegisterExtCommand – used to register each of the commands in our module:
      • FunctionCode – A code for the POS Command being registered (Code[20]).
      • Description – A description of the POS command (Text[50]).
      • Codeunit – The Object Id of the Codeunit containing the POS command.
      • ParameterType – The parameter data type, an option field on the POS Command table. 0 for no parameter.
      • Module – The code of the module the POS command belongs to.
      • BackGrFading – Boolean to fade the POS background when this command runs.

    When a POS command is being requested, the OnRun() trigger is invoked with the “POS Menu Line” record’s Command field holding the FunctionCode of our POS command. We use a case statement to determine which (if any) procedure within our Codeunit to run:

    As a personal preference, I like to encapsulate the FunctionCode for each POS command and the Module code value in procedures:

    It’s good practice not to enter literal text values into code generally, but I also find it useful to be able to retrieve these codes in certain circumstances. Note I’ve added the locked parameter to the Label constants, this is to stop the code value being translated. The code should stay the same for consistency, whatever the language used.

    Register the POS Command

    Before we can use our new POS command module we’ll need to register it within LS Central. This is done from the External POS Commands page:

    Register POS Command

    Filter to our new Codeunit and hit OK:

    Select POS Command Codeunit

    Check our new POS command is registered:

    Registered POS command

    Note: Every time you add a new POS command to your module Codeunit you’ll need to re-register.

    Get the full demo Codeunit on GitHub.

    Get the Visual Studio Code snippet here.

  • Programming Lookup and Numpad controls for LS Central Web POS

    Programming lookups and numpads for LS Central Web POS

    If you’ve been used to working with LS Central Windows POS you my find a bit of a surprise when upgrading your existing solution or programming lookups and numpads for LS Central Web POS

    Programming lookups and numpads for LS Central Web POS

    LS have implemented the POS user interface with client add-in components embedded within a Business Central page.

    The fundamental difference between the Web and Windows POS is in the interaction between Business Central and the LS client add-in components:

    • LS Windows POS – Uses .NET add-in components which behave synchronously.
    • LS Web POS – Uses JavaScript client add-in components which behave asynchronously.

    So what does this mean for my AL code?

    Synchronous behavior means you can invoke the Numpad or Lookup control and get the result as a return value. Nice and simple in terms of AL code:

    if OpenNumericKeyboard(DepositTxt, '', ValueTxt, false) then
      Evaluate(Amount, ValueTxt);


    With the LS Web POS, the asynchronous behavior of the JavaScript add-in components requires a bit more work; You must first invoke the control, then wait for an event which will contain the result.

    The event you need to subscribe to will vary depending on the control you’ll be using, but you’ll find the relevant events in Codeunit “EPOS Controler” (LS spelling, not mine!), for example:

    • OnKeyboardResult
    • OnLookupResult
    • OnNumpadResult

    OK, so lets look at an example.

    Programming a Numpad control

    So the steps are as follows:

    • Open the numeric keyboard control
    • Subscribe to the OnNumpadResult event to get response
    • Process the response, if the result is for you

    Open the NumericKeyboard

    To invoke the number pad control we use the OpenNumericKeyboardEx() procedure from Codeunit 10012732 “EPOS Control Interface HTML”, which has the following parameters:

    • Caption: The title of the number pad control. Should be instructional to the user.
    • DefaultValue: If required, you can pre-populate the value on the popup using this parameter.. or leave blank
    • Result: Not used
    • payload: An identifier we can use when deciding if to handle the OnNumpadResult() event, for instance we could use the POS Command code.
        local procedure RecordFootfall()
        var
            EPOSControl: Codeunit "EPOS Control Interface HTML";
            EnterFootfallLbl: Label 'Enter store footfall';
            Result: Action;
        begin
            EPOSControl.OpenNumericKeyboardEx(EnterFootfallLbl, '', Result, RecordFootfallCommand());
        end;

    Subscribe to the OnNumPadResult() event

    Once we’ve opened the numeric keyboard control, well need to wait to pick up the result via an event. We subscribe to the OnNumpadResult() event in Codeunit 10012718 “EPOS Controler”, and test the raised event is the one we’re interested in using the payload parameter:

        [EventSubscriber(ObjectType::Codeunit, Codeunit::"EPOS Controler", 'OnNumpadResult', '', false, false)]
        local procedure OnNumpadResult(payload: Text; inputValue: Text; resultOK: Boolean; VAR processed: Boolean)
        begin
            case payload of
                RecordFootfallCommand():
                    HandleFootfall(inputValue, resultOK, processed);
            end;
        end;

    Process the result

    The processed parameter needs to be set to true to stop LS from trying to continue and process this result. It will actually error in our case as at some point it will try and evaluate the payload to an integer.. in usual LS error handling finesse…

    We can use the resultOK parameter to check if the user pressed the OK button. As the return value is a Text variable we’ll have to evaluate this to a Decimal to get the format we require.

        local procedure HandleFootfall(FootfallAmountTxt: Text; ResultOk: Boolean; var Processed: Boolean)
        var
            Footfall: Decimal;
            DataTypeErr: Label 'Footfall amount must be a decimal value.';
        begin
            Processed := true;
            if not ResultOk then
                exit;
            if FootfallAmountTxt = '' then
                exit;
            if not Evaluate(Footfall, FootfallAmountTxt) then
                error(DataTypeErr);
        end;
    That’s it, thanks for reading.